This tutorial is a guide only and shows how to remove the factory door trim and install the SoundSkins sound deadening kit for the 2015 & on Subaru Impreza, includes STi, WRX & RS.
We can recommend professional stores that can assist.
Estimated Installation Time:
2 Doors – 3 hours
4 Doors – 5 hours
Contact Details:
Should you require any help please feel free to contact us.
P: (02) 9831 3288
E: team@carboncarsystems.com.au
A: 21/47 Third Ave, Blacktown, NSW, 2148
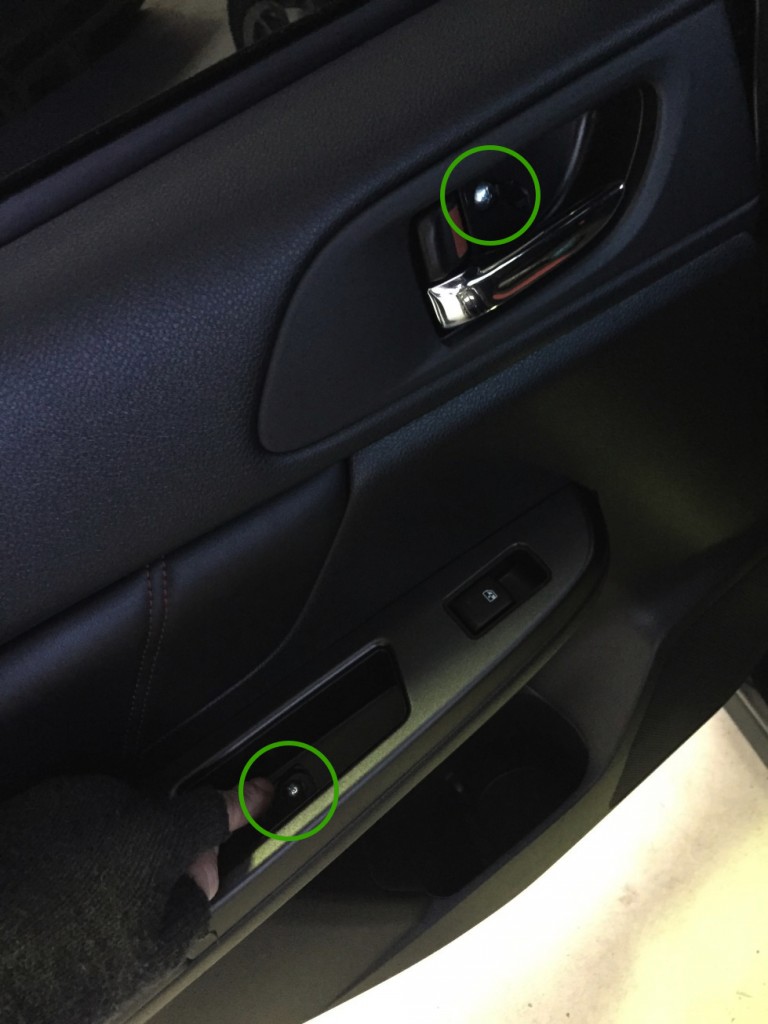
Step 1
First ensure all your windows are completely in the up position.
Use the none marring pry bar to open these two tabs and use the provided screw driver to undo these screws.

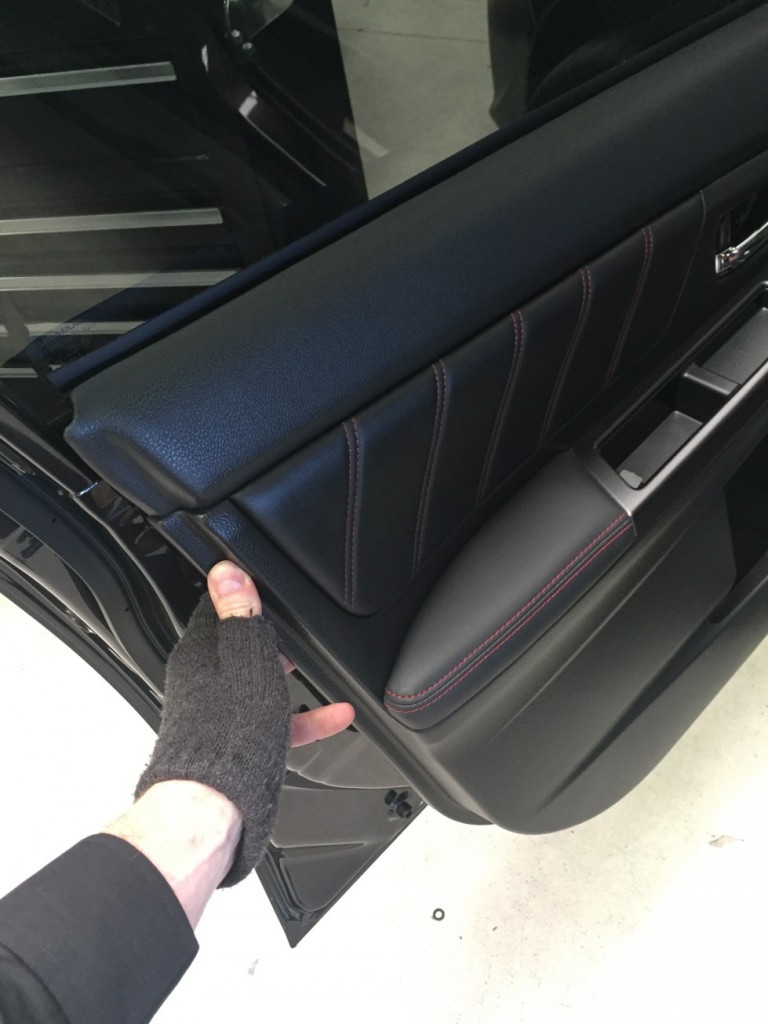
Step 2
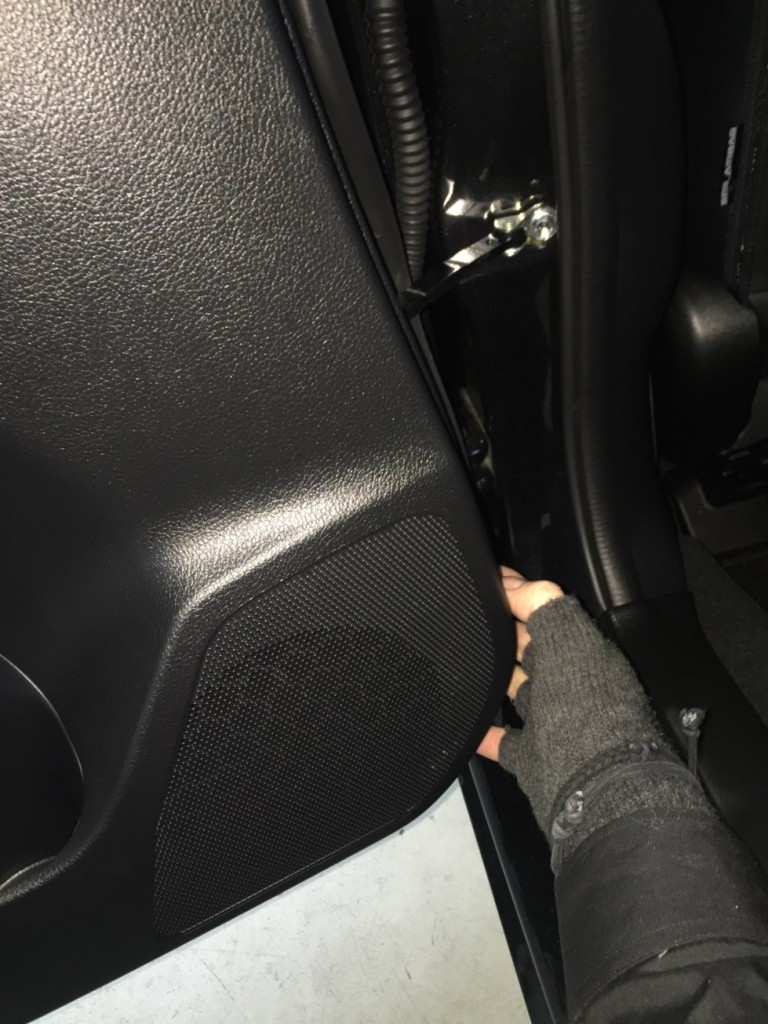
Pop the door trim off by pulling here towards yourself by supporting trim and pulling firmly.
Step 3
Work your way around the trim pulling it towards yourself till all clips have loosened. Then slide the trim upwards to lift it off the window frame.
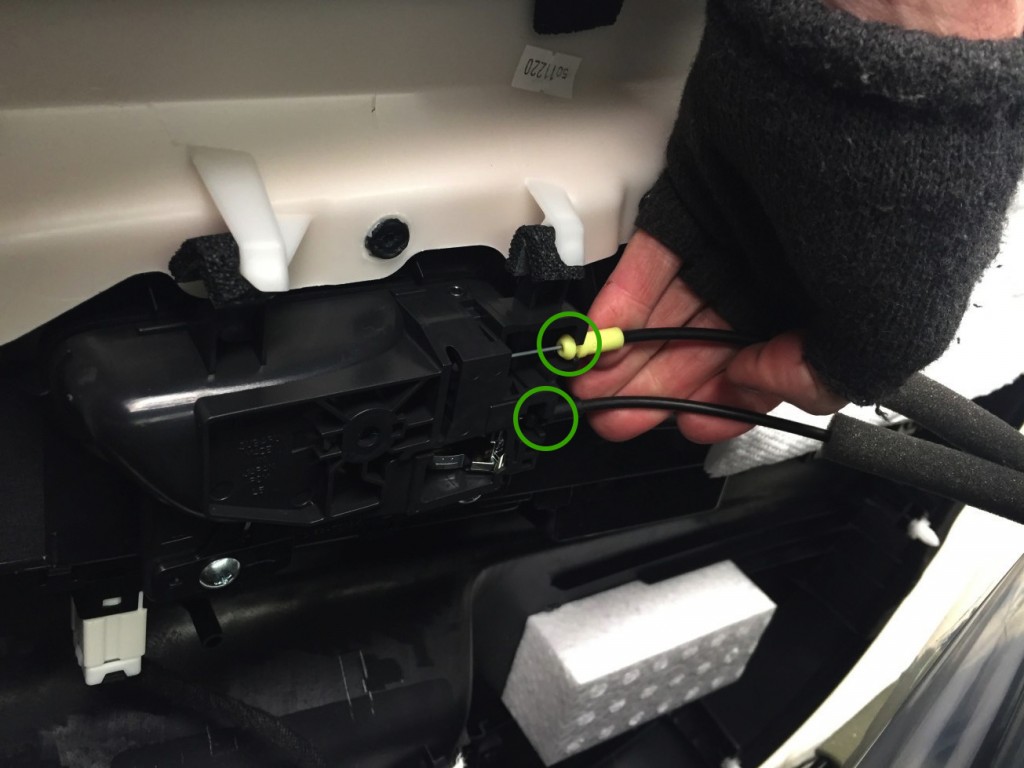
Step 4
Support the door in one hand and pull these two tabs forward so they pop out, then lift the cables up and out of the slots.
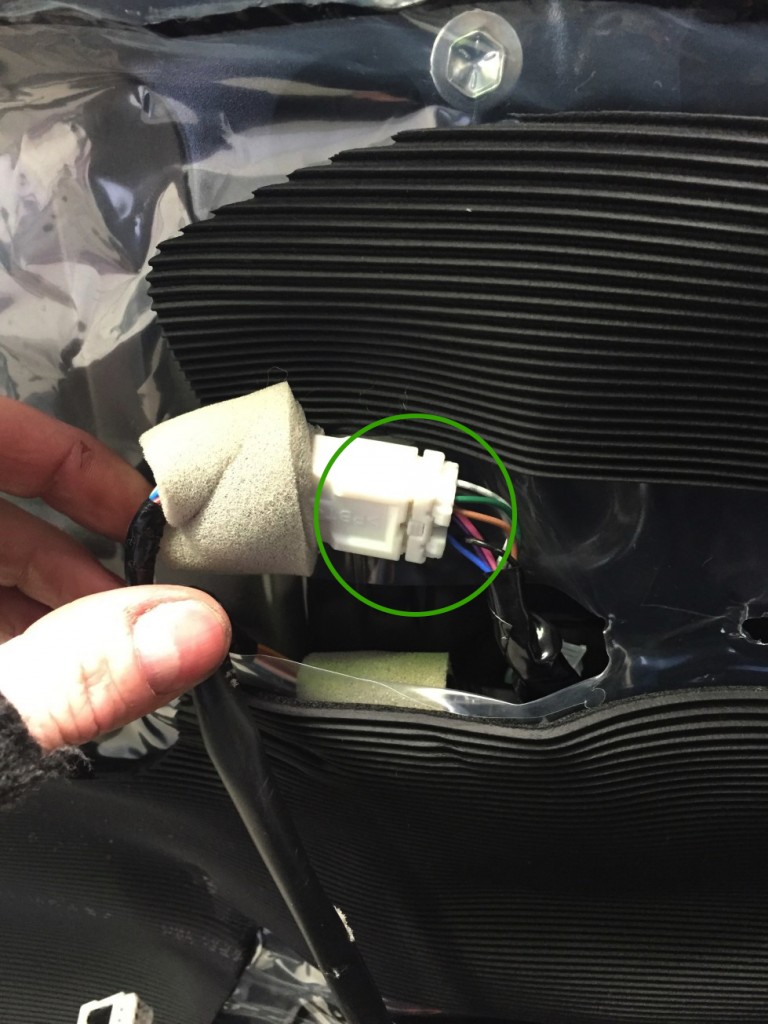
Step 5
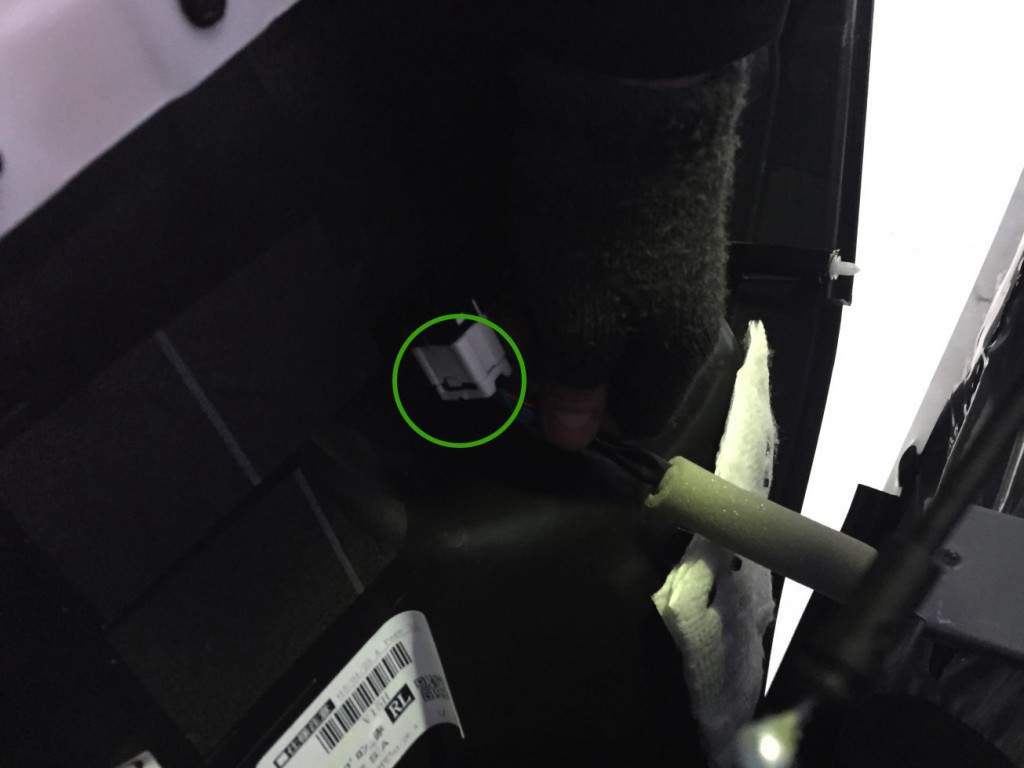
Whilst still supporting door push the centre button of this plug to release it from the window switch.

Step 6
Once door trim is removed check for any plastic clips that have remained in place and remove them and put back on the door trim ready for putting trims back on at end.
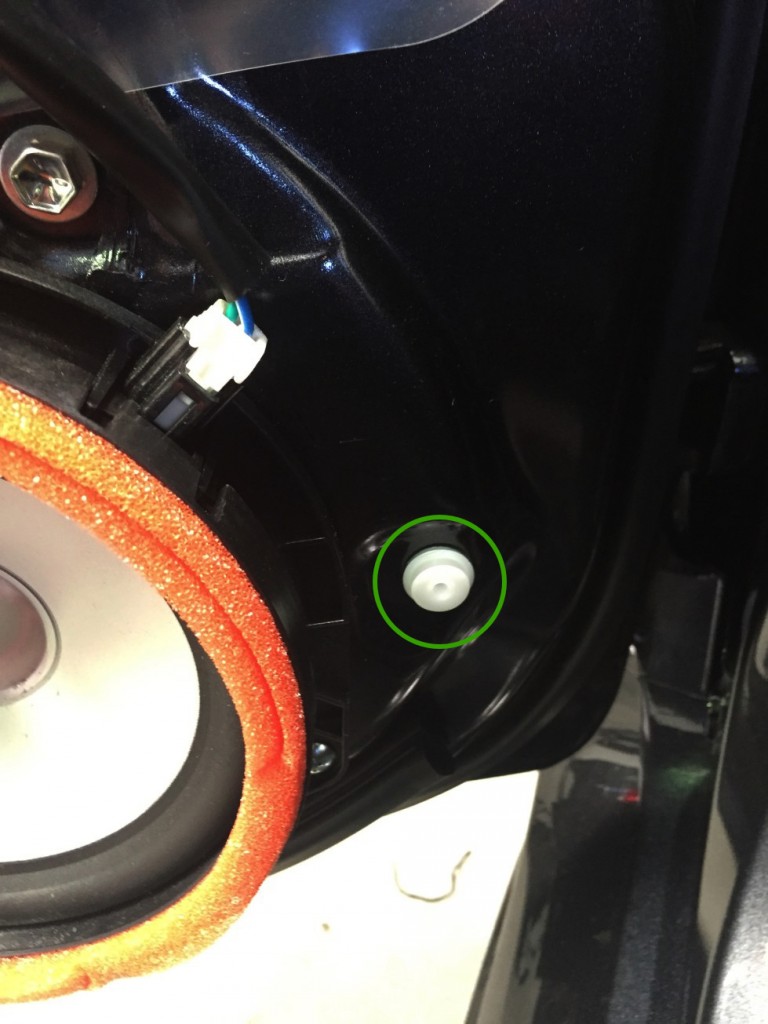
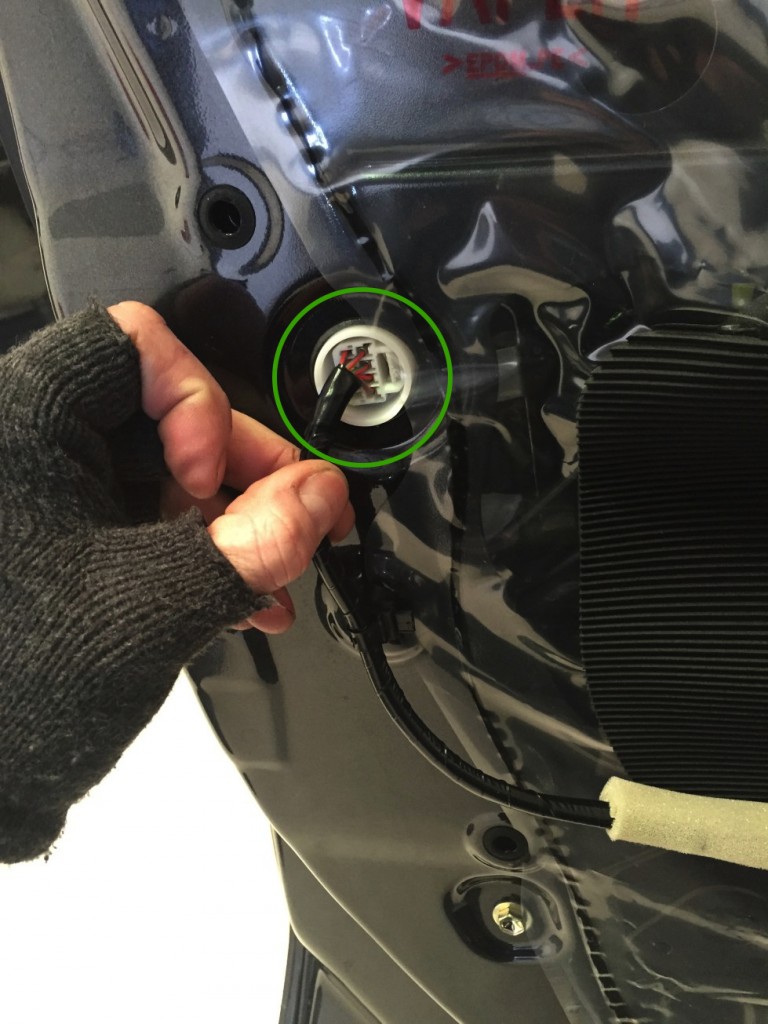
Step 7
Push down locking tab and remove this plug from the outer section of the door.
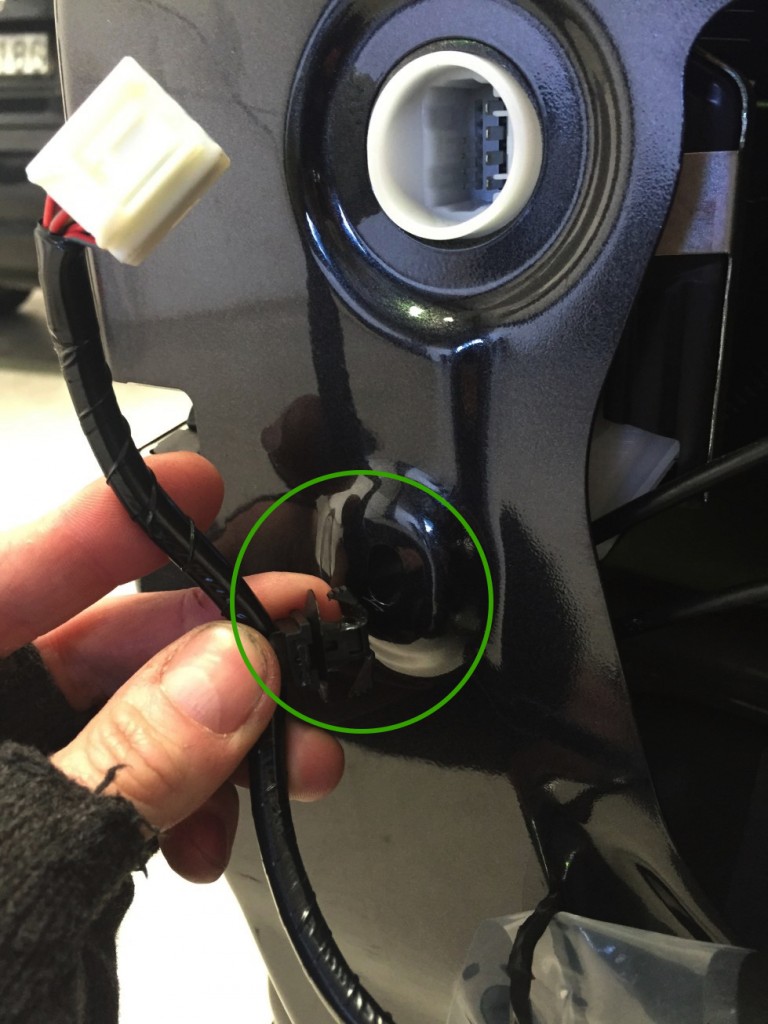
Step 8
Also pull towards yourself and remove the cable mounting clip so the loom is loose ready for feeding through the SoundSkins. Pull directly straight out towards you firmly they are quite tight.
Step 9
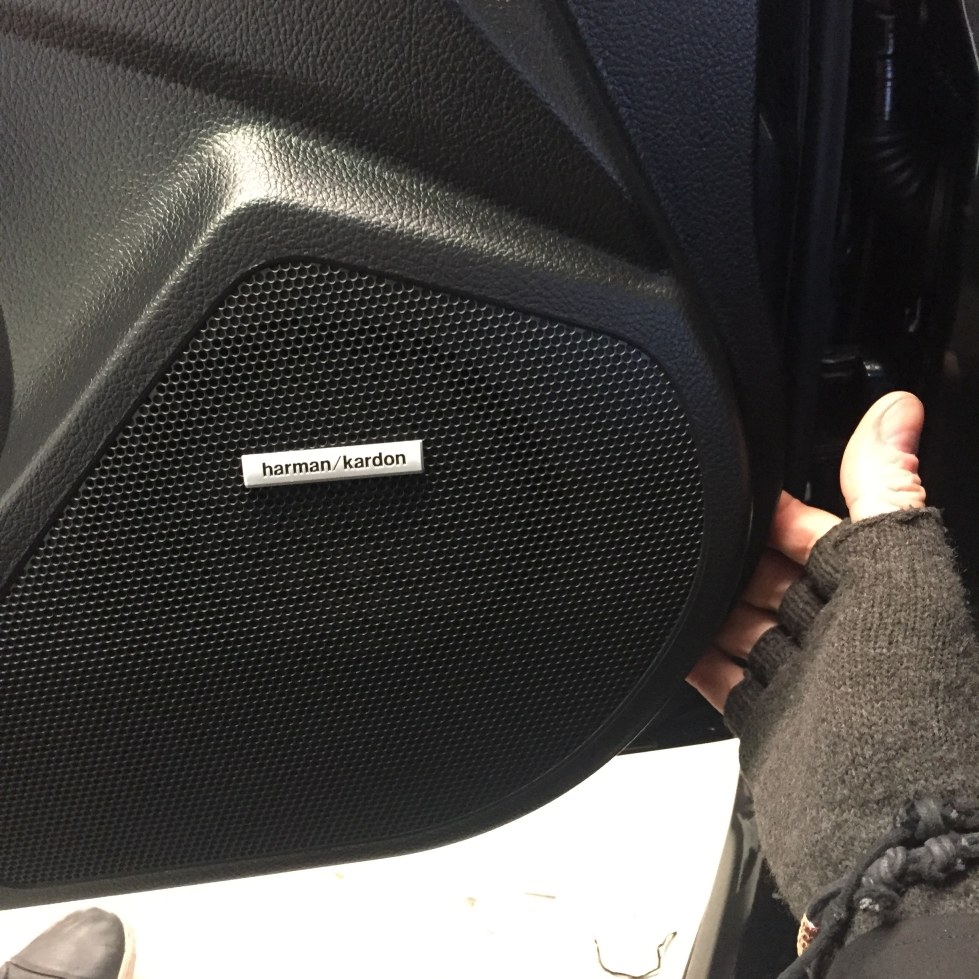
Undo speaker cable by releasing this clip here. Then unscrew and remove the speaker using provided screw driver.

Step 10
Release these cables from each other by pushing centre button and remove them from the door mounting also so they are hanging loose to feed through SoundSkins.
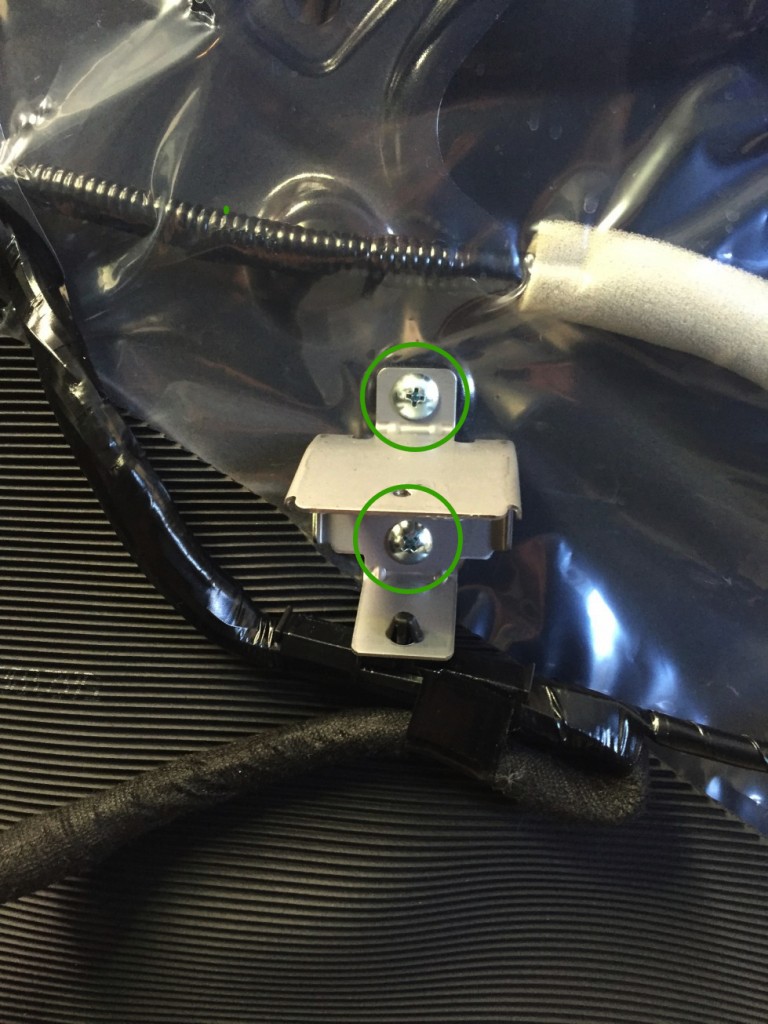
Step 11
Remove these two screws and remove the armrest mounting bracket.
Step 12
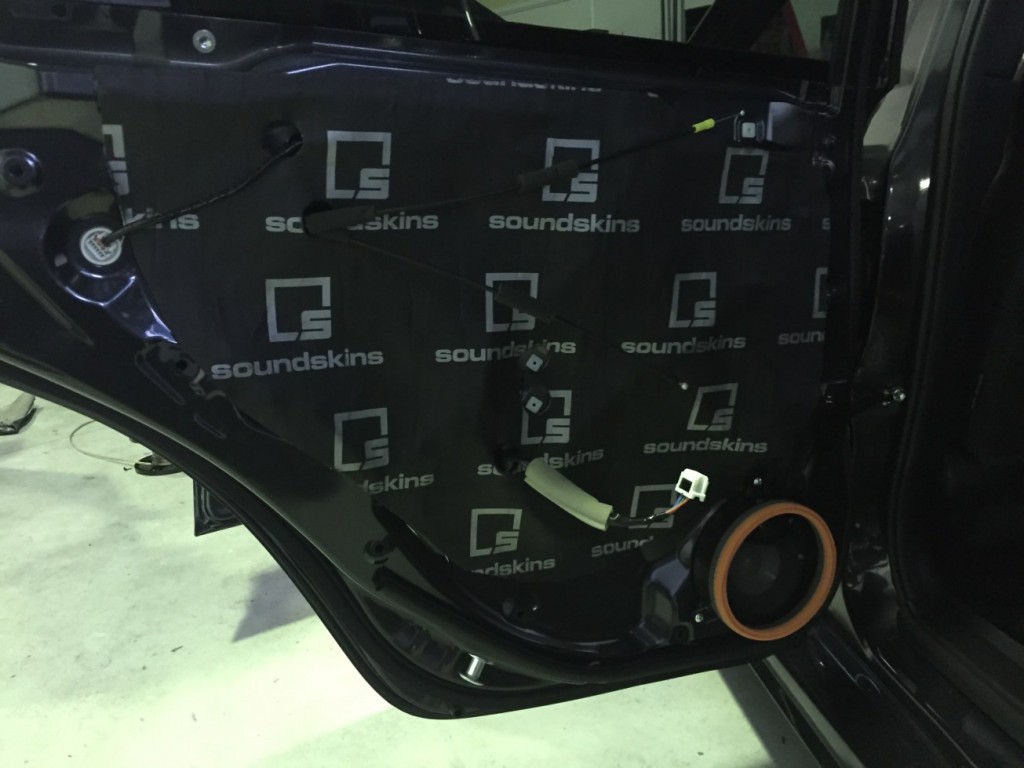
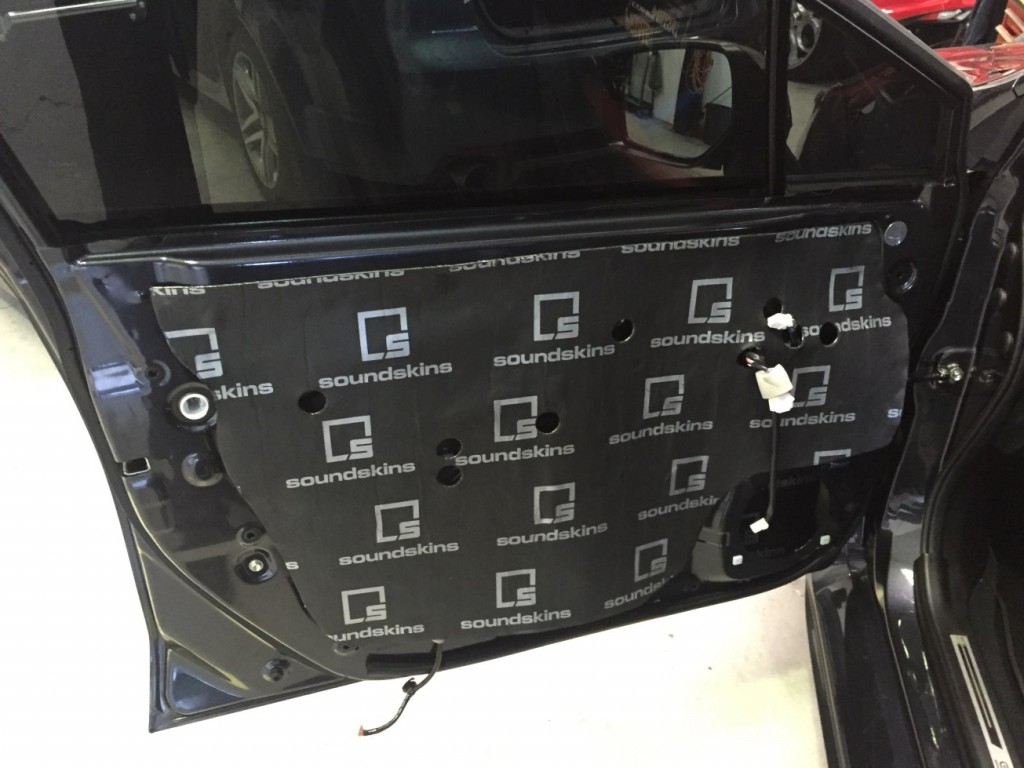
Remove plastic covering from around the door, try to remove as much of the black sticky goo during removal. You can dab the goo on itself to pull small sections off. Prepped door should look like this ready for the SoundSkins.

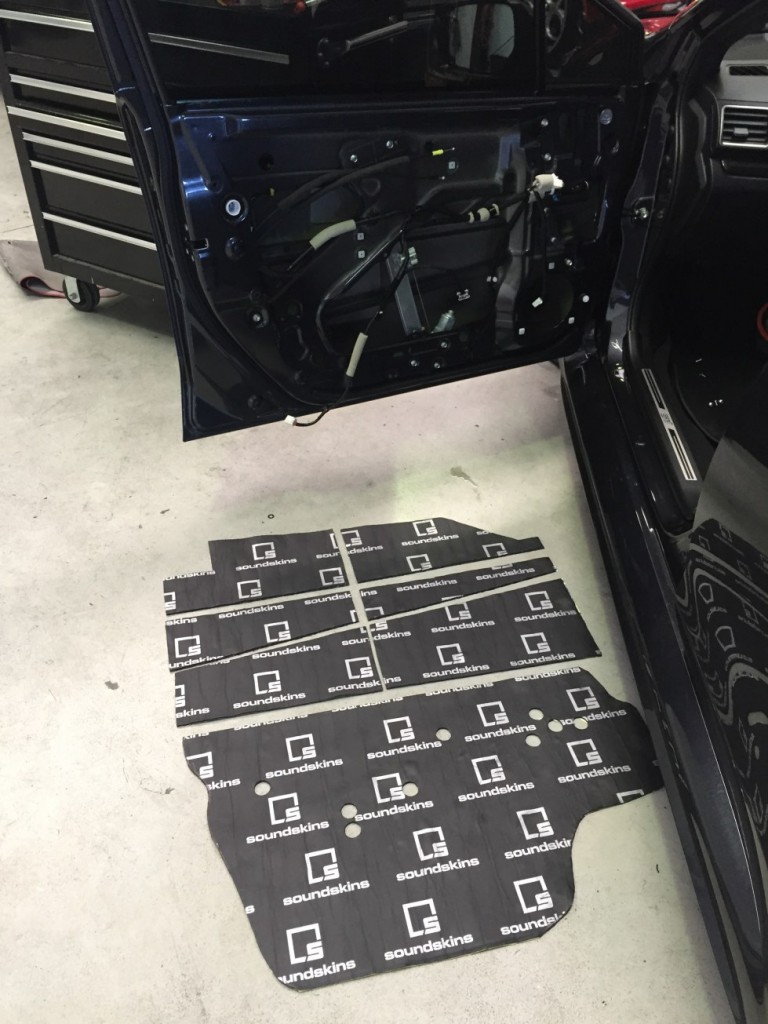
Step 12
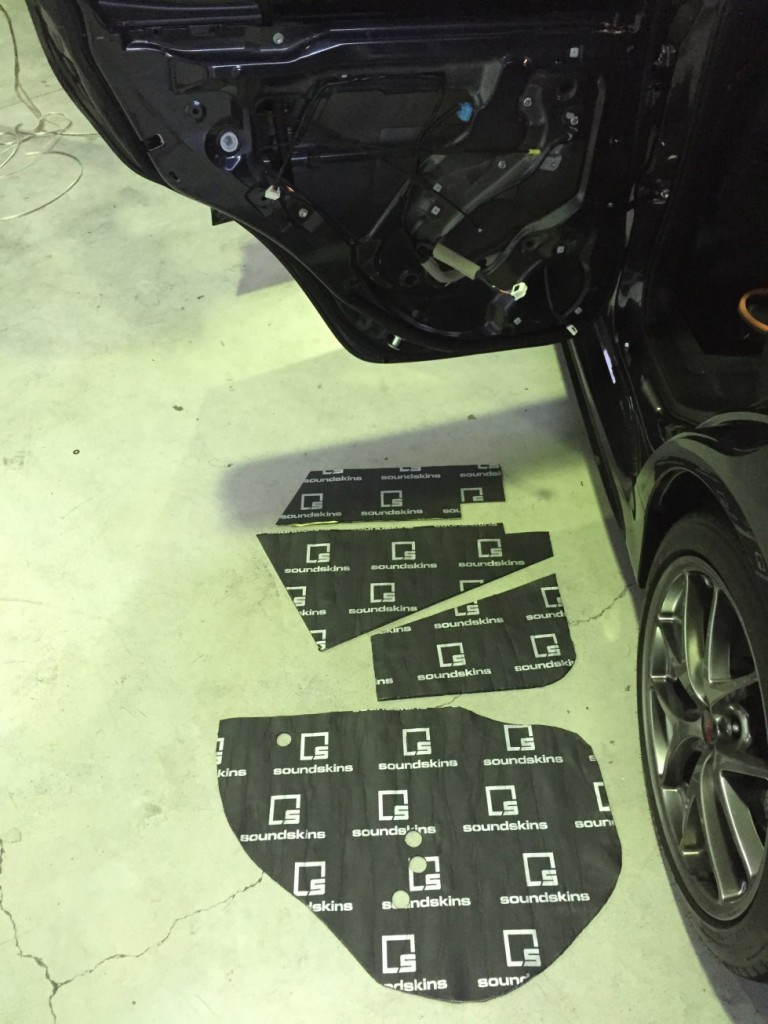
Layout the skins ready to mount on door. Top 6x pieces are the outer skins for the inside of the door and the large bottom single piece is the inner skin for the outer cover of the door (replacing plastic).
Passenger door shown, drivers door reversed.
The layout shown is how they are situated inside the door in this order.
Step 12
Start with the top left piece and remove the backing plastic and insert through the gaps in the door with the window up.
Move down the pieces in order:
Top Left -> Top Right
Middle Left -> Middle Right
Bottom Left -> Bottom Right

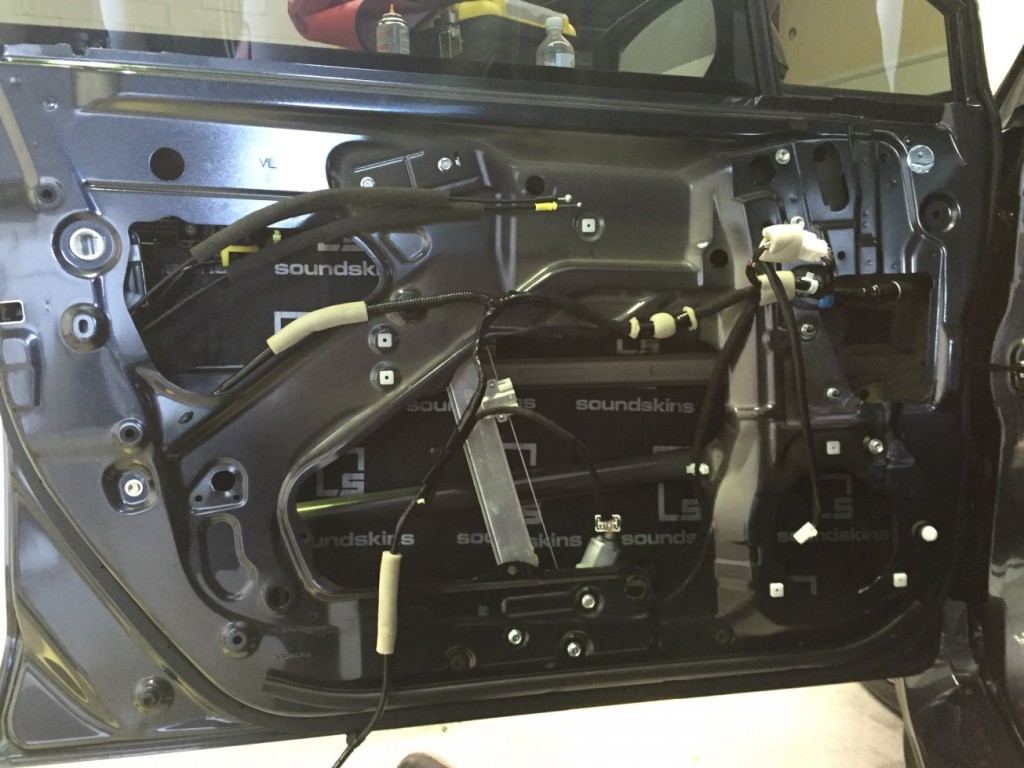
Step 13
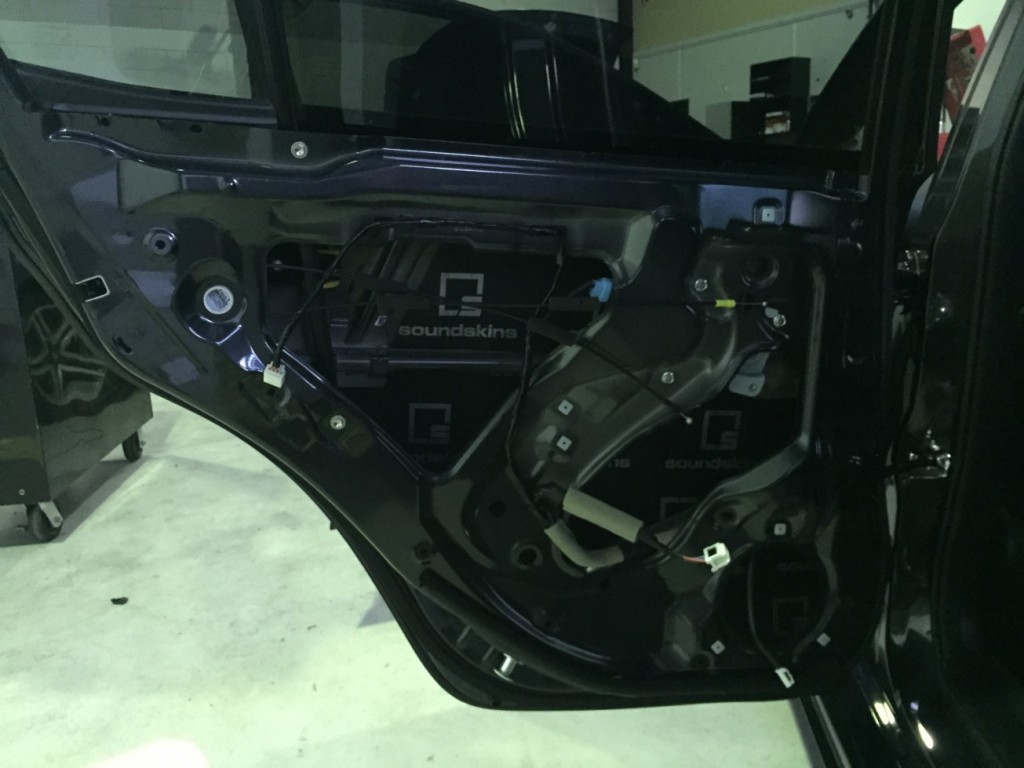
Once all pieces are in place for the inner skin it should look like this ;D
Step 14
Now we remove the backing from the large single outer skin. The best way to position this is to start by sticking the top first and positioning it level and line up the holes with evenly so they are centred.
Step 15
Pass these plugs that where undone earlier through the pre-cut holes.

Step 16
Pass the door cables through the skin in this position be careful not to tear the skin.

Step 17
Pass all other cables through the skin in the appropriate holes.

Step 18
Press the skins against the door layer as smooth as possible ensuring as much contact as possible for the adhesive.

Step 19
Then return all the plugs to original holes, return the speaker and also the arm rest mount.
Continue to do the same for the drivers door & you are complete for the front! Return the door trim back onto the door.

Step 20
Similar to the front, use the non-marring pry bar to open these two covers and remove the screws.
Step 21
Again remove the door trim by pulling it towards yourself and release the plastic clips.
Step 22
Support the door in one hand and pull the handle cables outwards to release from the latch.

Step 22
Press the centre button to release the plug from the rear of the window switch.
Step 23
Remove the armrest handle and unplug the door lock plug shown. Then continue to remove the plastic on the door.

Step 24
This is the layout of the rear doors in order. The top 3 pieces are the inner skin and the large single piece is the outer.
Place in order:
Top -> Middle -> Bottom
Then do the outer layer skin last.
Step 24
This is how the inner skin should look.
Step 25
Place outer skin from the top down and push plugs through the trim. Then return all plugs to original positions including arm rest bracket.
Return the door trim and repeat for drivers side rear.
Job complete, well done!